


There are several ways of importing data to the open database in Database Tour:
- Dragging database files from Windows Explorer;
- Importing data from clipboard;
- Using the specific data importing or exporting GUI.
Import Data by Dragging Database Files
Use this way to quickly import data from file tables into new tables of the active database.
In the Windows Explorer, select the database files of types .db (Paradox), .dbf (dBase), .csv etc, which you want to import data from, and drag them into the table list of the open database in Database Tour.
Import Data from Clipboard
This way allows to import some not too big structured data 'on-the-fly' without needing to create any additional files or database objects.
The interface is similar to creating schemas for text tables at the first step and allows to control all the steps of importing in a convenient visual mode.
To start the process, copy the source data to clipboard, open your target database and choose Tools | Import from Clipboard....
This way gives you, besides other benefits, a workaround when your source data are accessible through the 32-bit architecture but the target database is accessible through the 64-bit architecture, or vice versa. For example, you want to import the contents of a text file into the PostgreSQL database, but the text ODBC driver is 32-bit and the PostgreSQL client is 64-bit, so you cannot complete the task using the standard export/import means neither in the Database Tour 32-bit nor Database Tour 64-bit.
There is a detailed example of importing data from clipboard.
Import Data using Specific GUI
This way lets you fine tune the importing process.
To import data from a certain data source into a certain table of the active database, use Import button ![]() or the corresponding item from Tools menu.
or the corresponding item from Tools menu.
It is possible to import data from another table or SQL query of the current database, or from a table of external database. As a target, you can choose either already existing table or a new table which will be created 'on the fly' during the import procedure.
Note: Instead of importing data, it is sometimes more convenient to use the data exporting with the source and target databases swapped. Behind the scene, the process is the same.
Steps to import data into a new or existing table of the open database
1. Choose Tools | Import Data... menu or click the Import button on the tool bar. To import from a table from the current database, in the table list, right-click the table you wish to import data from, then choose Import Data from <TableName>...
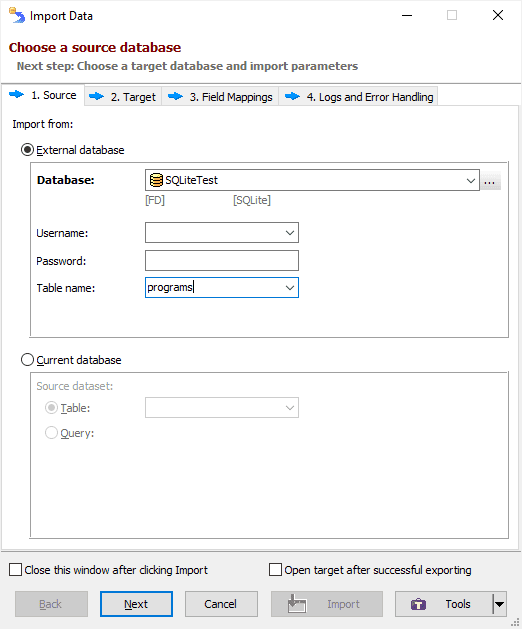
2. Select the data source. It can be a table of an external database as well as another table or database query from the current database. Click Next.
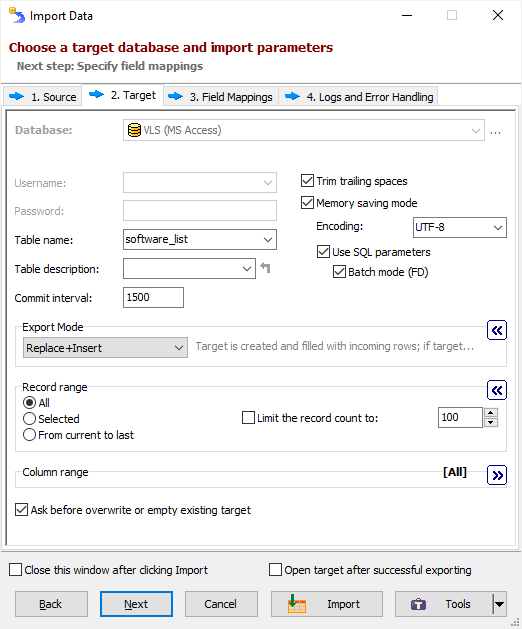
3. Specify the name of the target table and select desired import/export options (described in Database Export Format topic). Click Next.
4. Specify source-to-target field mappings and click Import. This step can be skipped (if you click Import instead of Next at the previous step); in this case the application will build the field mappings implicitly. But it is recommended to specify the field mappings explicitly for existing target tables, and the corresponding fields in source and target must have compatible types.
See also