This topic describes synchronizing data between two databases in Database Tour by examples.
Suppose we need to synchronize data between a source database (master) and a target database (slave). This goal can be achieved by using Database Tour data export means. It is very important to choose the correct export mode and key fields for every table that needs data synchronization; the recommendations are given below. Please also consider that the smoothest data synchronization is possible when no data deletion is required.
Below, two scenarios are shown:
- The first scenario shows how to synchronize data from one dataset between Firebird database and Interbase database.
- In the second scenario, we will synchronize data between three tables in Firebird database and the corresponding tables in Interbase database. You can build your own data syncing process by easily expanding this scenario on any number of tables and any types of the source and target databases supported by Database Tour.
Process Preparation
It is not mandatory but it is recommended to register both the source and the target databases before you start to configure your export process.
For speed reasons, it is recommended to use FD interface for both sides (i.e. for source and target databases).
Both databases must support the same architecture: 32-bit or 64-bit. I.e. one Database Tour instance must successfully open both databases.
Note: On our websites, you can find both versions of Database Tour: 32-bit and 64-bit. Please check which one you are downloading. If your operating system is 64-bit, you can install both Database Tour 32-bit and Database Tour 64-bit and use them independently. Please also note that one user license covers both 32-bit and 64-bit versions.
Synchronizing Data from One Table
- Open the source database.
- Choose a dataset to export. I.e. select a table in the table list or write and execute your database query.
- If you chose the table, switch to Data page.
- Click Export button
 in the toolbar above.
 - Switch to the Database tab and select your registered target database.
- Specify a target table. Turn on the Memory saving mode option and all its sub-options. If source data and/or column names on master or slave side may contain Unicode characters, make sure to choose the correct SQL stream encoding, e.g. UTF-8.
- Choose the correct Export mode. For example:
- Choose Replace+Insert, if the target table does not exist yet or if you want to recreate it completely.
- Choose Empty+Insert, if the target table already exists and you need to delete all its data and insert the data from the source.
- Choose Append+Update, if the target table already exists and you need to add missing rows to it and update existing rows.
- etc. (see description of the selected export mode next to it)
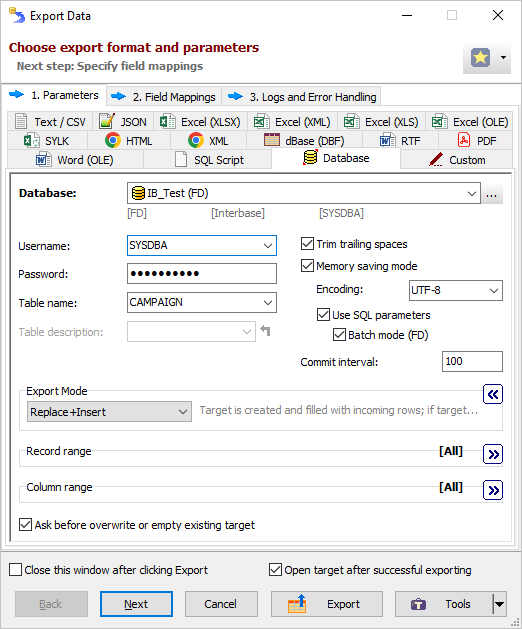
- Click Next. Check the source-to-target field mappings. Here, you can remove unnecessary mappings, add calculated fields, specify target column types (when exporting to a new table) etc. If you chose Append+Update export mode on the previous screen, you will need also to specify the key fields here, which will be used for matching source and target rows.
- Click Export.
Synchronizing Data from Several Tables
- Open the source database.
- In the Object Browser to the left, switch to the Tables tab.
- Right-click the table list and choose Multiple Selection.
- Select tables to synchronize data from. In this example, we select three tables:
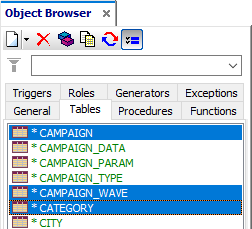 First two tables already exist in the target database, and the last one does not exist yet.
- Click Export button
 or choose Tools | Export Data | Selected Tables... menu.
 - Switch to the Database tab. From the list of registered databases, select the destination database and specify export parameters. Some notes:
- Turn on the Memory saving mode option and its related options. In case of exporting problems, if you suspect that they can be caused by these options, try different combinations of them. If source data and/or column names on any side may contain Unicode characters, make sure to choose the correct SQL stream encoding, e.g. UTF-8.
- Choose the Export mode to be applied to the most of the tables. We can override it for specific tables at the next (Table Mappings) step.
- Leave the Table name field empty; otherwise, the data will be exported to one destination table.
- The bigger Commit interval value, the faster your exporting process. But too big value may cause memory and other issues. Therefore, try to play with it to find the optimal value before porting the solution to your production environment.
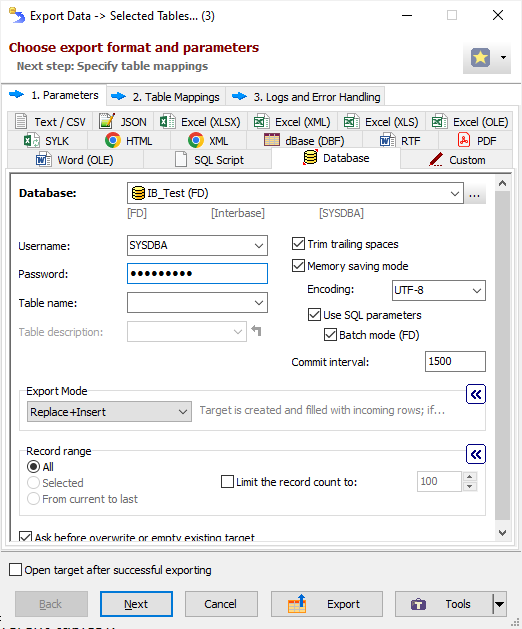
- Click Next and specify the source-to-target table mappings, i.e. the correspondence between source and target tables.
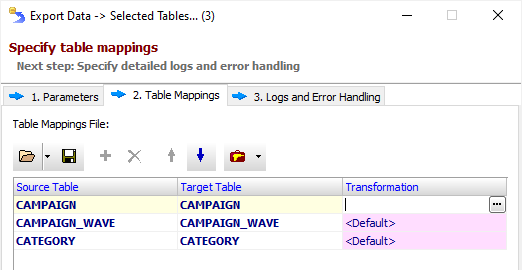 Here, it is also possible to specify full column specifications for target tables, and override Export mode for each table (if you need different export modes for different tables). To override Export mode, let's click '...' button in the Transformation column.
First table already exists in the destination database. Let's specify Append+Update export mode for it in the Table Options section above. For this mode, we need also to specify key field(s) by which the record matching will be done. Key fields are columns from the target table; they must be present in the field mappings below to let the application know what source columns they correspond to.
In the Field Mappings section below, make sure the correspondence between the source and destination columns of the selected table are built correctly by the application. Correct them if needed.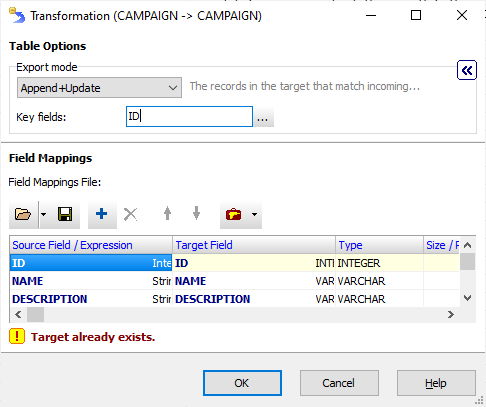 Configure the table transformation for other two tables. Specify Append+Update export mode for the second table (which exists in the database database) and Replace+Insert export mode for the last table (which does not exist yet).
Finally, we can change the table processing order using the corresponding buttons. Let's move the last table to the first position. In our example, the order of the tables does not matter. But there are cases, when the order is important, for example, when the target tables are referenced by each other using foreign keys.
Here is how the table mappings look after the configuring: Notes
Notes
- It is strongly recommended that the target table has a unique constraint based on Key Fields you specified for Append+Update export mode.
- Append+Update export mode does not cover cases, when some rows from the source table are deleted, so, the synchronizing would be incomplete in this mode.
The Delete export mode cannot help in this case, because it deletes those rows from the target table which exist in the source table.
Another solution would be using Empty+Insert export mode, but when other tables in the target database refer the synchronized table by the foreign keys, there could be problems with emptying the table (unless you specify cascade deleting rule for those foreign keys which could be not desired in many cases). Please also note that deleting rows is an expensive operation, especially for large tables or when using foreign keys extensively. Besides that, the insertion of an increasingly large array of data (with regular synchronization) immediately leads to a regular increase in the process execution time. That is, repeated using of Empty+Insert export mode is recommended for relatively small tables that are not burdened by mutual links through foreign keys with other tables.
So, pay enough time to choose the optimal export mode for your data synchronization weighing all the pros and cons.
- If you want to specify export logs or change the default error handling options, proceed to the next step by clicking Next. You can skip this step by clicking Export.
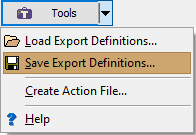
- After you finish the process configuring, and before proceeding to start the process, you can save all the settings to a file using the Tools button below. If you need to repeat the process in the future, you could just load that file and save your time without needing to build the process from scratch.
- Click Export to begin the procedure. You can interrupt the process by pressing ESC or by clicking Cancel in additional window which is shown during the exporting process.
See also


